I will admit that I’m that mom that has the best of intentions but sometimes falls short. Case in point when I first got pregnant with Everly I had big hopes that I would breastfeed and not use a binkie or need a binkie clip.
Well……..I can happily say that I have been breastfeeding now for 4 months Whoop Whoop! Wouldn’t you know it though our adorable little lady is a binkie lover. No judging, we can’t all be perfect!

However now the reality of this little binkie addiction is setting in. Let me tell you, searching for a binkie at 2 am drives me nuts. Even worse having to race to the store in pajamas to get one. So the need for an adorable binkie clip is a huge necessity right now. Sooo I decided I would just make some, and share how I did it with all of you!
Who is ready to make one, two or ten? No seriously they are super easy and fun to make.
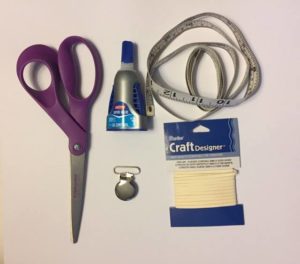
Supplies:
- Leather cord here on amazon or a local craft store
- Super Glue
- Scissors
- Binkie clips (suspenders clips, you can find them in bulk at your local craft store or here on etsy)
- Ruler
- Chair leg, Clipboard, or your toe!
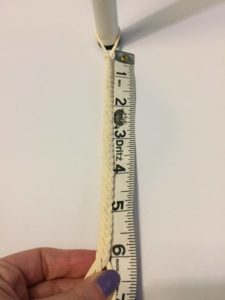
Step 1: Cut two pieces of the leather cord 32 inches long. Fold them both in half.
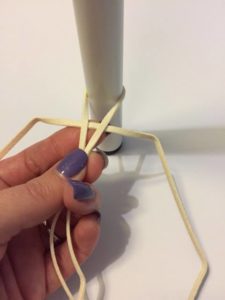
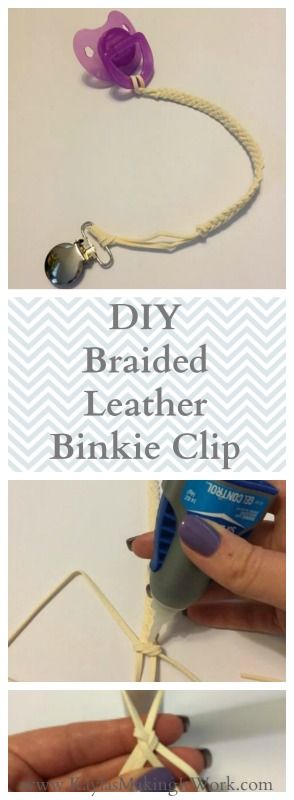
Step 2: Take one piece of leather and make a loop about 1 1/2 inches long and wrap it around the chair leg as shown above.
Step 3: Take the second piece of leather and hold it under the loop you made above.
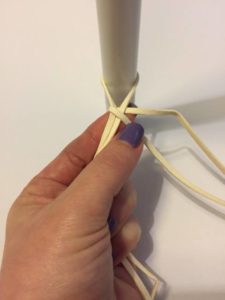
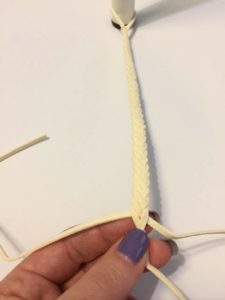
Step 4: You’re going to start braiding now. you should have four strands. Take the furthest left strand and cross it over the two middle ones.

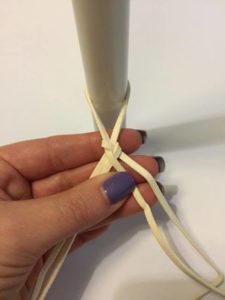
Step 5: The furthest right strand you will only cross over one strand, like a regular braid.(see above) So cross over two strands on the left and one on the right.
Step 6. Keep going until you reach about 6 inches or so. Just be certain it’s not long enough to wrap around baby’s neck as that could be a choking hazard.
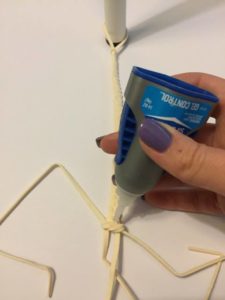
Step 7: Now to finish it off nicely. You’ll take the two outer strands and do a knot. Add a dab of super glue before you tighten it. Turn braid around and with the same two strands do another knot. Add a dab of super glue before you tighten it.
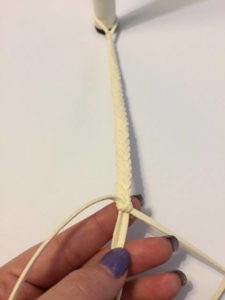
Step 8. Now turn the braid around and tie another knot with the same two strands. Dab glue before tightening the knot.
Step 9: Allow glue to dry, trim off the ends from the knot. I haven’t had one come undone yet !
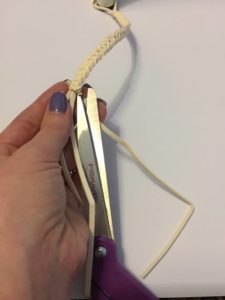
Step 10: Almost done !! Slip the two remaining ends through the binkie clip and secure with a knot.
Step 11: Trim ends to desired length. How simple was that !?
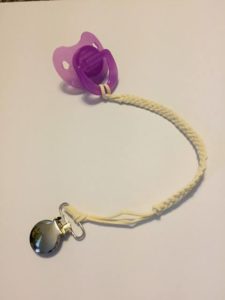
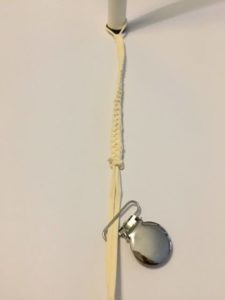
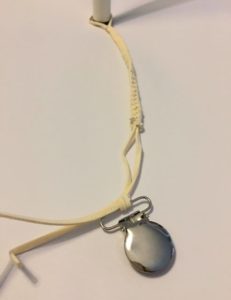
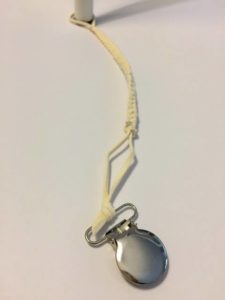
Step 12: To attach the binkie to the braided leather binkie clip, loop it through the braid and pull it through that 1 1/2 inch loop you made at the start.
Arent these super fun to make? I’d love to see the one you make tag me on Instagram @kaylaolayos
You can check out my favorite teethers here
Smile,
Kayla
Tags: binkie clip, braided pacifier clip, diy baby gift, leather binkie clip, pacifier clip